Creating a Codegen Feature: A Generalized Guide
Code generation from natural language commands is now commonly used in modern development workflows. We’ll build a tool that converts natural language instructions into functional Playwright test scripts that can interact with live browser sessions.
In this short guide we share a framework for building a natural language to Playwright code generator for any website. Our example uses a NextJS app with Browserbase, but the principles can be adapted for many different programming languages and frameworks.
Prerequisites
First of all let’s create a new NextJS app using create-next-app and add the necessary dependencies.
pnpm dlx create-next-app@latest --ts browserbase-codegen
pnpm add -D shadcn
pnpm add react-spinners
pnpm exec shadcn init
pnpm exec shadcn add separator tabs textarea button label input toast
Along with the dependencies above, you will also need:
- Anthropic account & API key
- Browserbase account & API key
You should add these values as variables in your .env.development.local file:
ANTHROPIC_API_KEY=
BROWSERBASE_API_KEY=
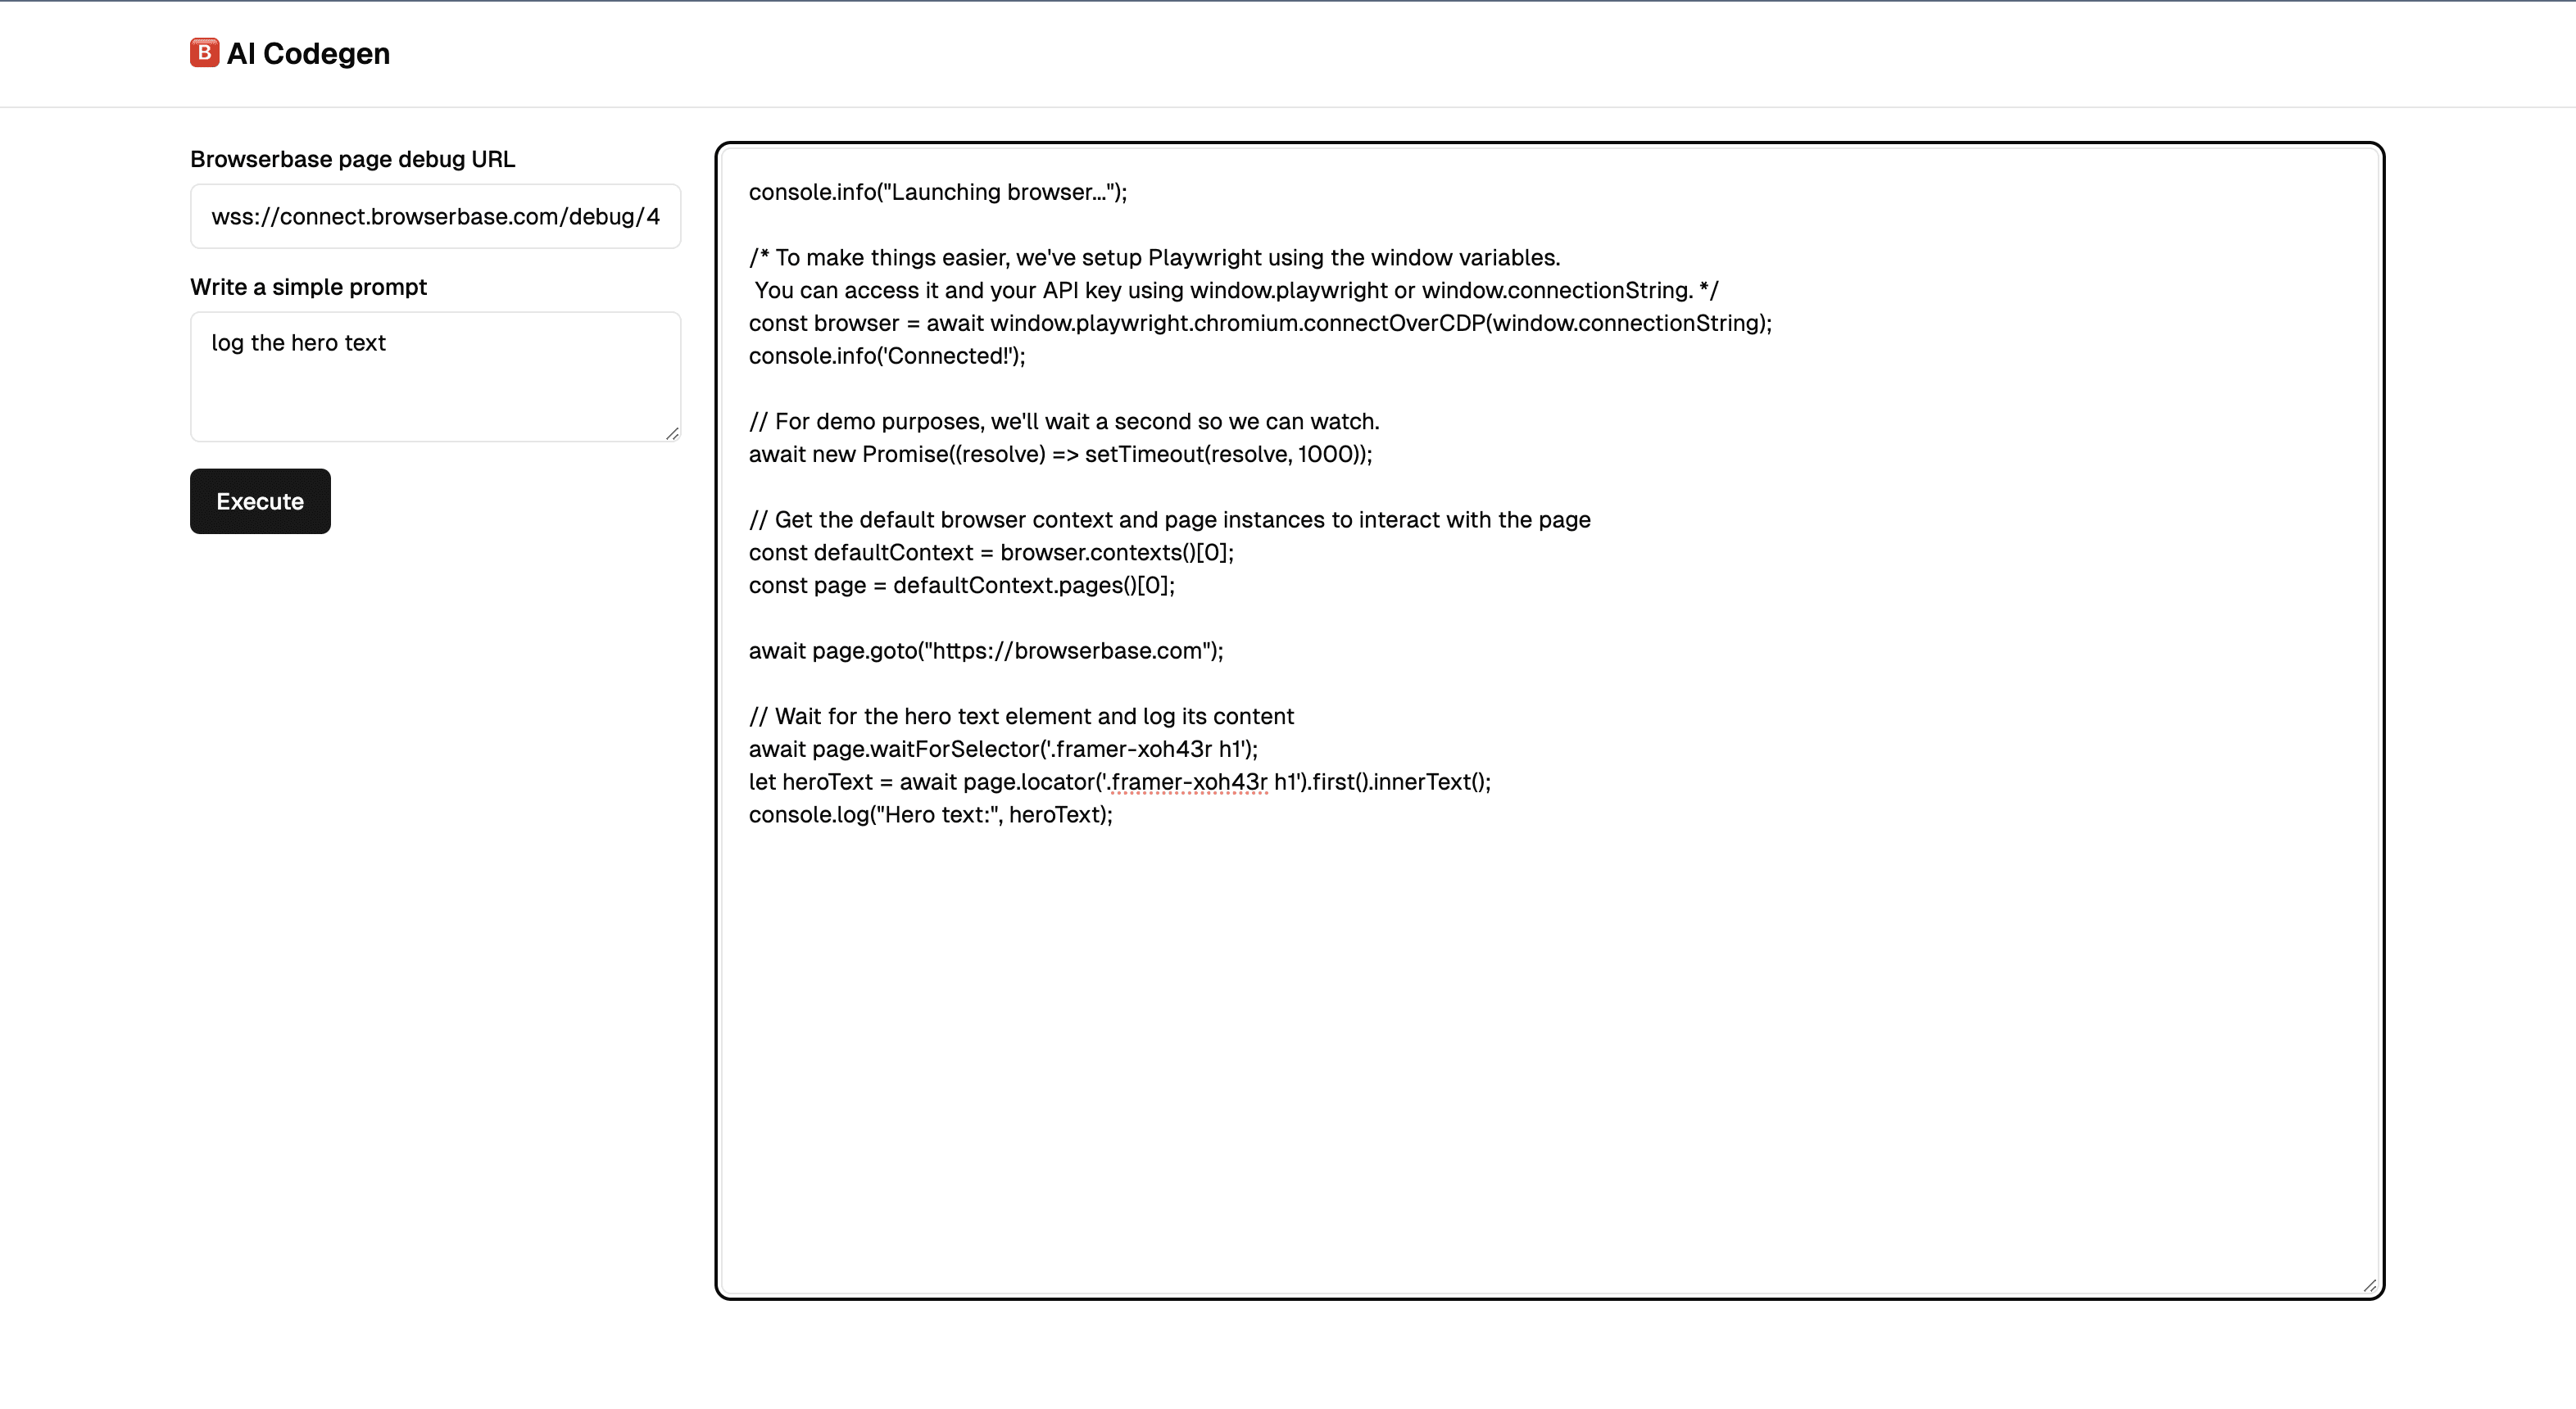
1. User Interface
Let’s start by building out a simple UI with our installed components for inputting prompts and displaying generated code.
Here are some key features we should consider for the UI:
- Support multi-line input for complex prompts
- Provide clear visual feedback for different states
- User-editable code input to make it possible to extend existing Playwright scripts
The component below is used to create the UI. Add this to your default NextJS page.tsx file. Don’t worry about the empty handleExecute and useEffect functions; we’ll get to these shortly.
// app/page.tsx
“use client”;
import { Button } from “@/components/ui/button”;
import { Input } from “@/components/ui/input”;
import { Separator } from “@/components/ui/separator”;
import { Textarea } from “@/components/ui/textarea”;
import { useToast } from “@/components/ui/use-toast”;
import { useEffect, useRef, useState } from “react”;
import { MoonLoader } from “react-spinners”;
import { codegenAction, getBrowserbasePage } from “./actions”;
export default function Codegen() {
const { toast } = useToast();
// The user’s input prompt
const [prompt, setPrompt] = useState(“”);
// The Playwright script to be generated or edited by the user
const [script, setScript] = useState(“”);
// The page we want to write the script for
const [websiteUrl, setWebsiteUrl] = useState(“”);
// THe component state
const [state, setState] = useState<“ready” | “connecting” | “generating”>(
“ready”,
);
// A toast that shows the current loading state
const staticToast = useRef<ReturnType<typeof toast> | null>(null);
const appendCode = (newLines: string) => {
setScript((prev) => prev + newLines);
};
// Execute a prompt
const handleExecute = async () => {
// To be implemented…
};
We’re relying on a toast to communicate various loading and error states. For toasts to work, we’ll need to put a <Toaster /> provider in our app/layout.tsx file. Let’s do that to complete the UI:
// app/layout.tsx
import { Toaster } from “@/components/ui/toaster”;
import type { Metadata } from “next”;
export default function RootLayout({
children,
}: Readonly<{
children: React.ReactNode;
}>) {
return (
<body>
{children}
</body>
</html>
);
}
With the UI so far, we’ve created:
- An easy way to input code and prompts.
- A way to submit the prompt for AI codegen.
- A way to handle loading states using toasts.
In the next step we’ll implement connecting to a running Browserbase session, generating valid Playwright JS code for the open page, and we’ll add some basic error handling and user feedback. Let’s continue.
2. Connect to a Browserbase page
Before we get to the exciting part of generating Playwright code, we need to pull some data from a running Browserbase session. To do this we’ll create a new file app/actions.ts where we’ll add a NextJS server action to connect to a new Browserbase session and visit the user-inputted URL stored in websiteUrl:
// app/actions.ts
“use server”;
import playwright from “playwright”;
export async function getBrowserbasePage(targetUrl: string) {
try {
const browser = await playwright.chromium.connectOverCDP(
`wss://connect.browserbase.com?apiKey=${browserbaseApiKey}`,
);
const defaultContext = browser.contexts()[0];
const page = defaultContext.pages()[0];
await page.goto(targetUrl);
let pageHTML = “”;
pageHTML = await page.evaluate(() => {
return document.documentElement.outerHTML;
});
if (!pageHTML) {
pageHTML = await page.content();
}
return {
pageHTML,
pageUrl: page.url(),
};
} catch (err: unknown) {
console.error(err);
throw new Error(“Failed to connect to session”);
}
}
The getBrowserbasePage action will be called from our client component to connect to a new Browserbase session, then get the page URL and the current DOM state for the target page ready to send to Claude for inference.
The handleExecute function in page.tsx is looking a little empty. We should add some code to the function that calls our new server action.
// app/page.tsx
// …existing code
const handleExecute = async () => {
if (!websiteUrl) {
toast({
title: “Empty Browserbase URL”,
description: “Please enter a Browserbase URL”,
});
return;
}
try {
setState(“connecting”);
const page = await getBrowserbasePage(websiteUrl);
if (!page) {
toast({
title: “Failed to connect to Browserbase page”,
description:
‘Ensure you have added your “BROWSERBASE_API_KEY” to the .env file’,
});
return;
}
// To implement: Codegen…
} catch (err: unknown)
console.error(err);
toast({
title: “Error”,
description: “Failed to execute the action (see console)”,
});
setState(“ready”);
} finally {
setState(“ready”);
}
}
While we’re in page.tsx, let’s add some code to the empty useEffect that provides user feedback based on the current state:
// app/page.tsx
// Handle different loading states
useEffect(() => {
let t;
switch (state) {
case “ready”: {
if (staticToast.current) {
staticToast.current?.dismiss();
staticToast.current = null;
}
break;
}
case “connecting”: {
t = {
description: (


How to build your own AI Codegen


Creating a Codegen Feature: A Generalized Guide
Code generation from natural language commands is now commonly used in modern development workflows. We’ll build a tool that converts natural language instructions into functional Playwright test scripts that can interact with live browser sessions.
In this short guide we share a framework for building a natural language to Playwright code generator for any website. Our example uses a NextJS app with Browserbase, but the principles can be adapted for many different programming languages and frameworks.
Prerequisites
First of all let’s create a new NextJS app using create-next-app and add the necessary dependencies.
pnpm dlx create-next-app@latest --ts browserbase-codegen
pnpm add -D shadcn
pnpm add react-spinners
pnpm exec shadcn init
pnpm exec shadcn add separator tabs textarea button label input toast
Along with the dependencies above, you will also need:
- Anthropic account & API key
- Browserbase account & API key
You should add these values as variables in your .env.development.local file:
ANTHROPIC_API_KEY=
BROWSERBASE_API_KEY=
1. User Interface
Let’s start by building out a simple UI with our installed components for inputting prompts and displaying generated code.
Here are some key features we should consider for the UI:
- Support multi-line input for complex prompts
- Provide clear visual feedback for different states
- User-editable code input to make it possible to extend existing Playwright scripts
The component below is used to create the UI. Add this to your default NextJS page.tsx file. Don’t worry about the empty handleExecute and useEffect functions; we’ll get to these shortly.
// app/page.tsx
“use client”;
import { Button } from “@/components/ui/button”;
import { Input } from “@/components/ui/input”;
import { Separator } from “@/components/ui/separator”;
import { Textarea } from “@/components/ui/textarea”;
import { useToast } from “@/components/ui/use-toast”;
import { useEffect, useRef, useState } from “react”;
import { MoonLoader } from “react-spinners”;
import { codegenAction, getBrowserbasePage } from “./actions”;
export default function Codegen() {
const { toast } = useToast();
// The user’s input prompt
const [prompt, setPrompt] = useState(“”);
// The Playwright script to be generated or edited by the user
const [script, setScript] = useState(“”);
// The page we want to write the script for
const [websiteUrl, setWebsiteUrl] = useState(“”);
// THe component state
const [state, setState] = useState<“ready” | “connecting” | “generating”>(
“ready”,
);
// A toast that shows the current loading state
const staticToast = useRef<ReturnType<typeof toast> | null>(null);
const appendCode = (newLines: string) => {
setScript((prev) => prev + newLines);
};
// Execute a prompt
const handleExecute = async () => {
// To be implemented…
};
We’re relying on a toast to communicate various loading and error states. For toasts to work, we’ll need to put a <Toaster /> provider in our app/layout.tsx file. Let’s do that to complete the UI:
// app/layout.tsx
import { Toaster } from “@/components/ui/toaster”;
import type { Metadata } from “next”;
export default function RootLayout({
children,
}: Readonly<{
children: React.ReactNode;
}>) {
return (
<body>
{children}
</body>
</html>
);
}
With the UI so far, we’ve created:
- An easy way to input code and prompts.
- A way to submit the prompt for AI codegen.
- A way to handle loading states using toasts.
In the next step we’ll implement connecting to a running Browserbase session, generating valid Playwright JS code for the open page, and we’ll add some basic error handling and user feedback. Let’s continue.
2. Connect to a Browserbase page
Before we get to the exciting part of generating Playwright code, we need to pull some data from a running Browserbase session. To do this we’ll create a new file app/actions.ts where we’ll add a NextJS server action to connect to a new Browserbase session and visit the user-inputted URL stored in websiteUrl:
// app/actions.ts
“use server”;
import playwright from “playwright”;
export async function getBrowserbasePage(targetUrl: string) {
try {
const browser = await playwright.chromium.connectOverCDP(
`wss://connect.browserbase.com?apiKey=${browserbaseApiKey}`,
);
const defaultContext = browser.contexts()[0];
const page = defaultContext.pages()[0];
await page.goto(targetUrl);
let pageHTML = “”;
pageHTML = await page.evaluate(() => {
return document.documentElement.outerHTML;
});
if (!pageHTML) {
pageHTML = await page.content();
}
return {
pageHTML,
pageUrl: page.url(),
};
} catch (err: unknown) {
console.error(err);
throw new Error(“Failed to connect to session”);
}
}
The getBrowserbasePage action will be called from our client component to connect to a new Browserbase session, then get the page URL and the current DOM state for the target page ready to send to Claude for inference.
The handleExecute function in page.tsx is looking a little empty. We should add some code to the function that calls our new server action.
// app/page.tsx
// …existing code
const handleExecute = async () => {
if (!websiteUrl) {
toast({
title: “Empty Browserbase URL”,
description: “Please enter a Browserbase URL”,
});
return;
}
try {
setState(“connecting”);
const page = await getBrowserbasePage(websiteUrl);
if (!page) {
toast({
title: “Failed to connect to Browserbase page”,
description:
‘Ensure you have added your “BROWSERBASE_API_KEY” to the .env file’,
});
return;
}
// To implement: Codegen…
} catch (err: unknown)
console.error(err);
toast({
title: “Error”,
description: “Failed to execute the action (see console)”,
});
setState(“ready”);
} finally {
setState(“ready”);
}
}
While we’re in page.tsx, let’s add some code to the empty useEffect that provides user feedback based on the current state:
// app/page.tsx
// Handle different loading states
useEffect(() => {
let t;
switch (state) {
case “ready”: {
if (staticToast.current) {
staticToast.current?.dismiss();
staticToast.current = null;
}
break;
}
case “connecting”: {
t = {
description: (